The following instructions are are how to run Kali Linux on a Windows 64-Bit Machine inside of a virtual box OS. This is strictly for educational purposes and is not safe or secure in anyway. To do that you will want to make an Excalibur USB.
You will want to download the following:
Kali Linux 64 Bit:
http://cdimage.kali.org/kali-2016.1/kali-linux-2016.1-amd64.iso
Virtual Box Download:
http://download.virtualbox.org/virtualbox/5.0.14/VirtualBox-5.0.14-105127-Win.exe
Virtual Box Extension Pack:
http://download.virtualbox.org/virtualbox/5.0.14/Oracle_VM_VirtualBox_Extension_Pack-5.0.14-105127.vbox-extpack
Step 1: Create a new Virtual Machine
I’ve already given instructions and provided links on how to get VirtualBox and install that above. If you’ve missed it, go back and install VirtualBox.
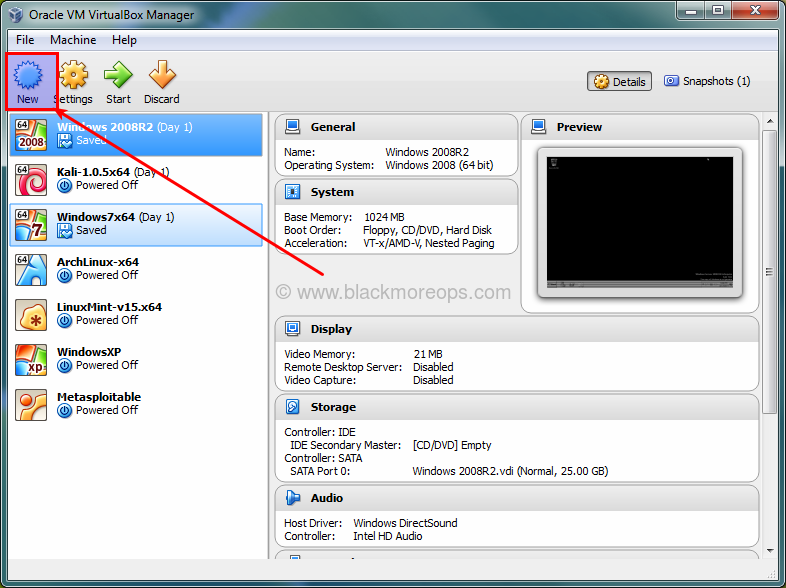
Once you’ve installed VirtualBox,
- Open it.
- Click on New to create a New Virtual Machine.

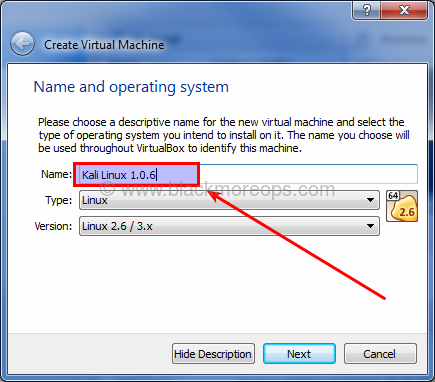
Step 1.a: Enter a name for you VBox
Enter Kali Linux 1.0.6 as the name. You’ll see Type is set to Linux automagically and version will be Linux 2.3/3.x. We will fix those later. Click Next.

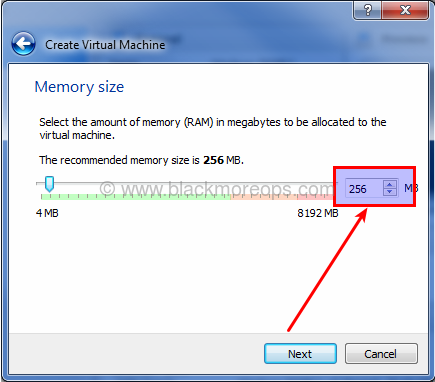
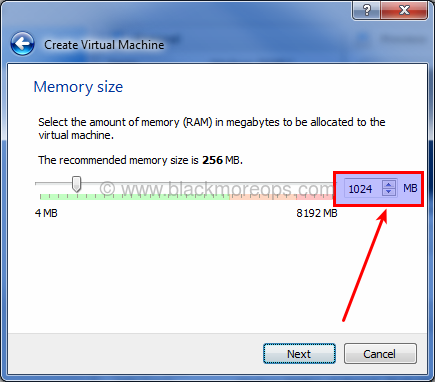
Step 1.b: Allocate Memory/RAM
Default memory size is 256 MB.

Change it to 1024 (1GB).

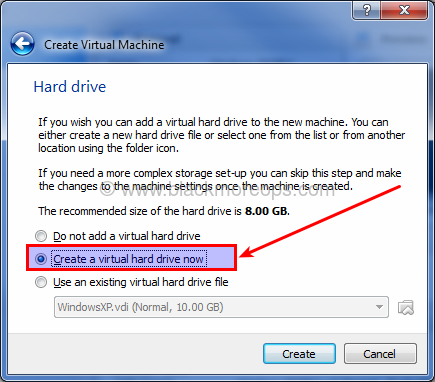
Step 2: Create a Virtual Hard Drive
In this screen select “Create a virtual hard drive now” – 2nd option and click Create.
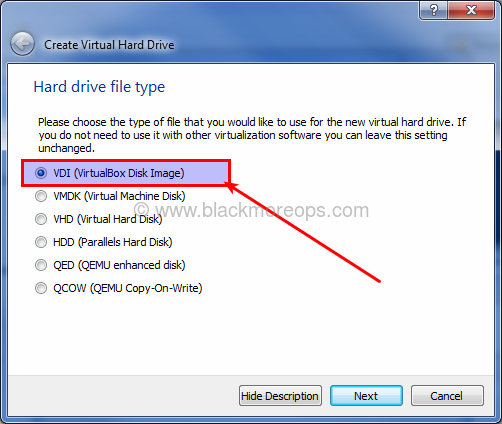
Step 2.a: Select Virtual Drive File type
On the next screen select “VDI” – VirtualBox Disk Image as your Hard Drive File Type. Click Next.

Step 2.b: Select Physical hard drive allocation type
Select Dynamically Allocated and click Next on Storage on Physical hard drive screen.
I will explain soon why we’ve chosen this.

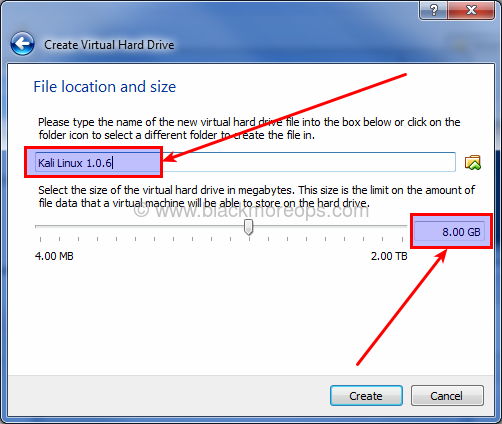
Step 2.c: Allocate disk size
On “File location and size” screen, it will come up as 8.00 GB as default size and Kali Linux 1.0.6 as the name (which we’ve set on step 1.a).

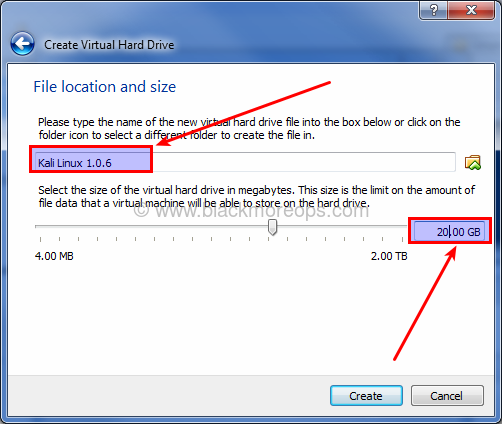
Change the Virtual Hard Drive size to 20.00 GB and Click Create.

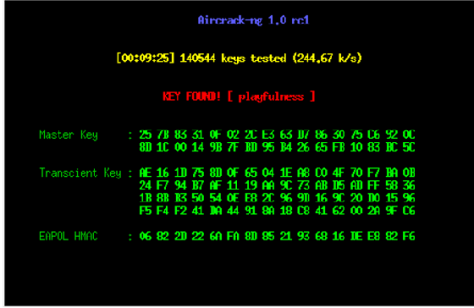
Here’s the best part.. on step 2.b we’ve selected Dynamicallt Allocated for our Storage on Physical hard drives. That means, you’re not wasting 20.00 GB disk space straight way. Usual Kali Installation install just below 5.00 GB. In this way, you will use only that much space, but your Virtual Hard Disk can increase up to 20.00 GB if you put more and more stuffs in there. An example is to downloading big dictionary files to crack WiFi passwords using Pyrit
So, yes, give it some space, it also helps avoiding some pesky installation errors.
Step 3: Modify VirtualBox settings
So far, we’ve done the followings, checklist for you:
- Created a New Virtual Machine
- Created Virtual Hard disk
- Fiddled with disk properties, type and size.
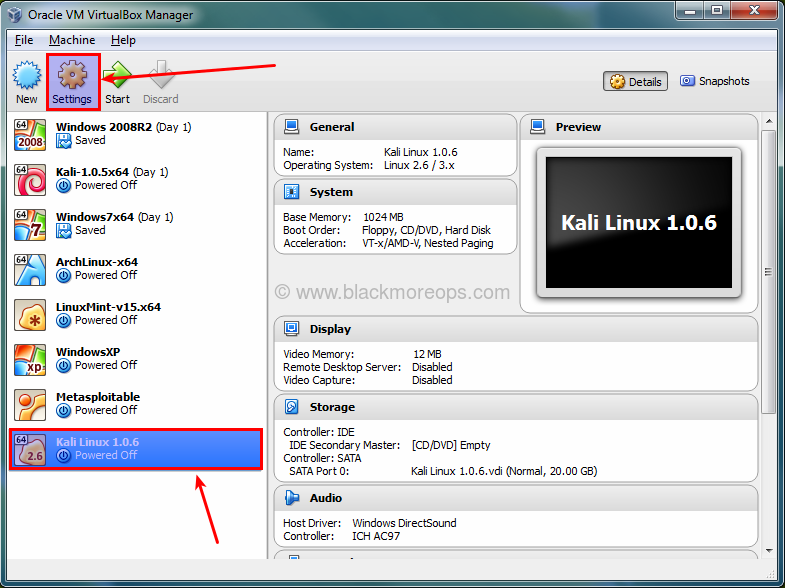
At this point you should be in the following screen. Note that I am using Kali 1.0.6 x64 bit, incase you’re using 32-bit you can change those options in here.

Select Kali Linux 1.0.6 (I got many), you might have just one and click on Settings icon
Step 3.a: Select type of OS
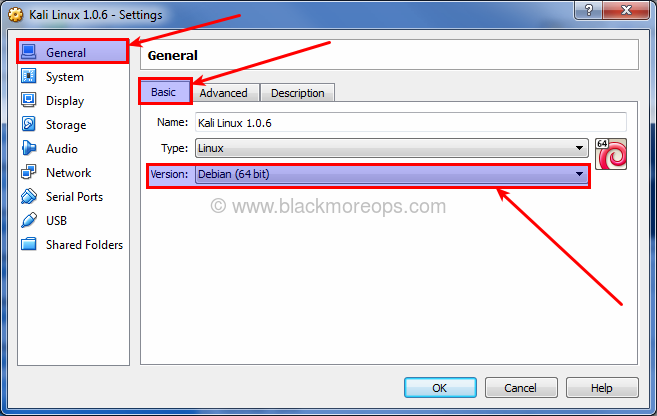
Depending on which ISO you downloaded you should select the correct Version here.
As Kali Linux is derived from Debian, I’ve selected Debian (64-bit) on General > Basic > Version. If you’re using a 32-bit ISO, select Debian (32-bit) as your version.

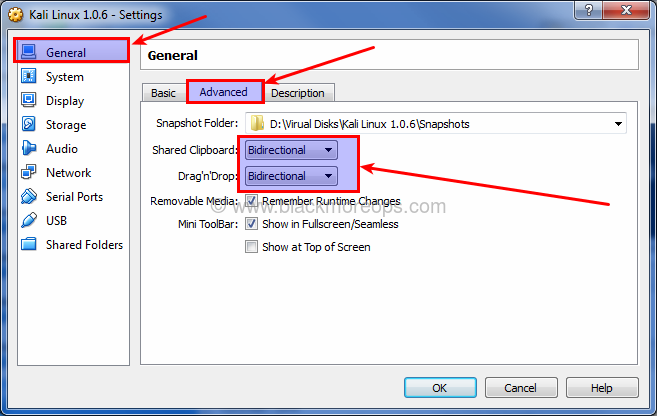
Step 3.b: Enable shared clipboard and dragn’drop feature
Select General > Advanced TAB and change Shared Clipboard and Dragn’Drop to Bidirectional. This will allow you to copy paste files from your HOST machine on the fly.

Step 3.c: Update Virtual Motherboard options
Select System > Motherboard, un-check Floppy (Do you even have a floppy disk drive anymore?) and Check the box for “Enable I/O APIC”. Note that you can change base memory allocation in the same screen. We’ve set it to 1024MB previously. My PC got 8.00GB RAM, which means I can actually allocate a lot more to make Kali response faster on my Virtual Machine. If you feel your Virtualized Kali Linux is slow, you should increase this Base Memory allocation.
The calculations are as follows:
1.00 GB = 1024MB
2.00 GB = 2048MB
3.00 GB = 3072MB
You get the idea, just multiply 1024 with the amount of Memory / RaM you want and put the value in here.
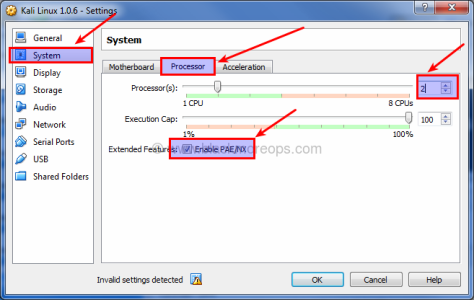
Step 3.d: Select number of Processors and enable PAE/NX
I’ve changed Processor to 2 (I got 8 CPU’s in my machine, this screen will show how many you got). Try sticking with EVEN numbers here.
Check the box for “Enable PAE/NX”.
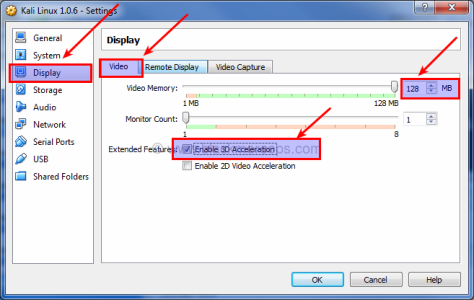
Step 3.e: Allocate Video memory and 3D acceleration
Select Display > Video and set Video Memory to 128MB. This allows you have a good responsive desktop environment.
Also check the box for “Enable 3D Acceleration”.
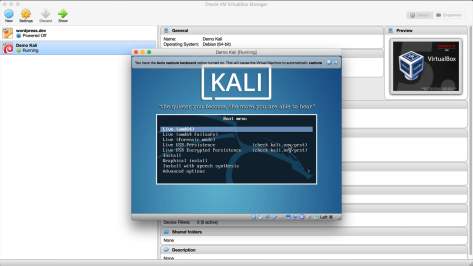
Step 4: Loading Kali ISO
Select Storage > Controller: IDE and highlight Empty CD ICON. Now on your right, you should be able to use the little CD ICON (it should be CD/DVD Drive: IDE Secondary Master already, if not change it) and select your downloaded ISO.
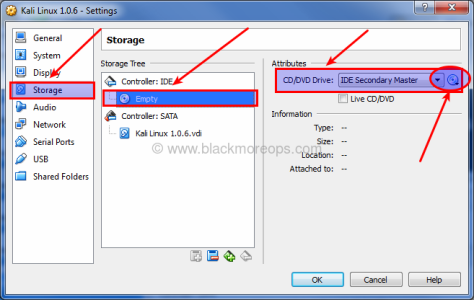
Once you select your downloaded ISO (in my case, it’s kali-linux-1.0.6-amd64.iso). See the properties and information’s changes accordingly.
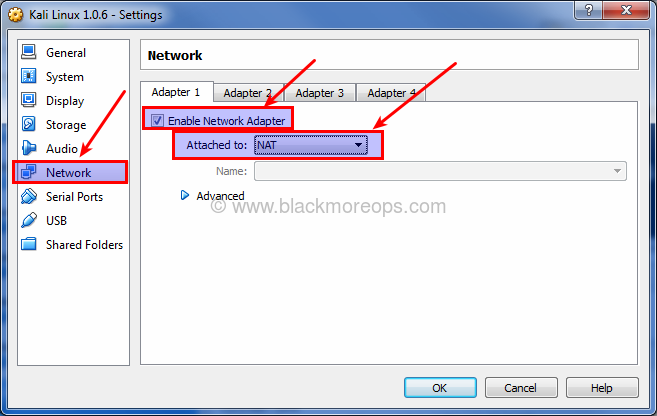
Step 4.a: Select Network connection type
If your computer is connection to internet, select NAT on Network > Adapter 1. You can enable more network adapters if you feel like to play around.

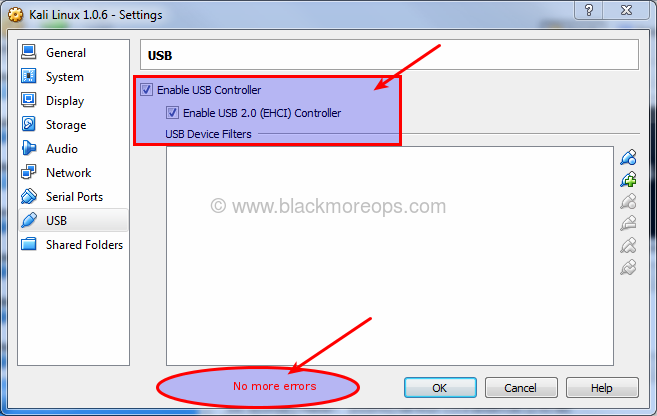
Step 4.b: Enable USB 2.0 Controllers
From USB TAB, check the boxes for Enable USB Controller > Enable USB 2.0 (EHCI) Controller. Note that I got “Invalid settings detected” error at the bottom of the screen. Install VirtualBox Extension Pack to remove this error.

You need to PRESS OK and save your Settings first.
Close VirtualBox and then install VirtualBox 4.3.10 Oracle VM VirtualBox Extension Pack for All supported platforms.
It will enable virtual USB 2.0 (EHCI) device support, VirtualBox Remote Desktop Protocol (VRDP) support, Host webcam passthrough support.
Re-Open VirtualBox and Select Settings > USB again to confirm you don’t have that error anymore. Save your settings by pressing OK.

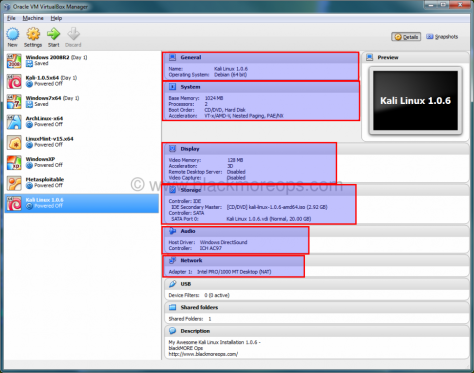
Step 4.c: Compare settings with mine
At this point your screen should be somewhat similar to mine. I’ve highlighted the imporatnt parts, if something didn’t match you can go back and enable disable those settings. Note that, for 32-bit users, it will be slightly different.